HTTP Backend (Pro)
The Semaphore UI HTTP backend for Terraform securely stores and manages Terraform state files directly within Semaphore. Available in the Pro plan, it offers several key advantages.
Features
- Secure State Storage: State files are stored securely within Semaphore.
- State Locking: Prevents concurrent modifications to the same state file.
- Version History: Track changes to your infrastructure state over time.
- UI Integration: Manage state files directly through the Semaphore interface.
Configuration
To start using the built-in HTTP backend, you first need to create a workspace for your Terraform task template.
To add a workspace, go to the Workspaces tab of your Terraform/OpenTofu template.
When creating a workspace, you will be prompted to select an SSH key for cloning private modules used in your Terraform code. If you do not use any private modules, simply select the None option.
Using the HTTP backend in tasks
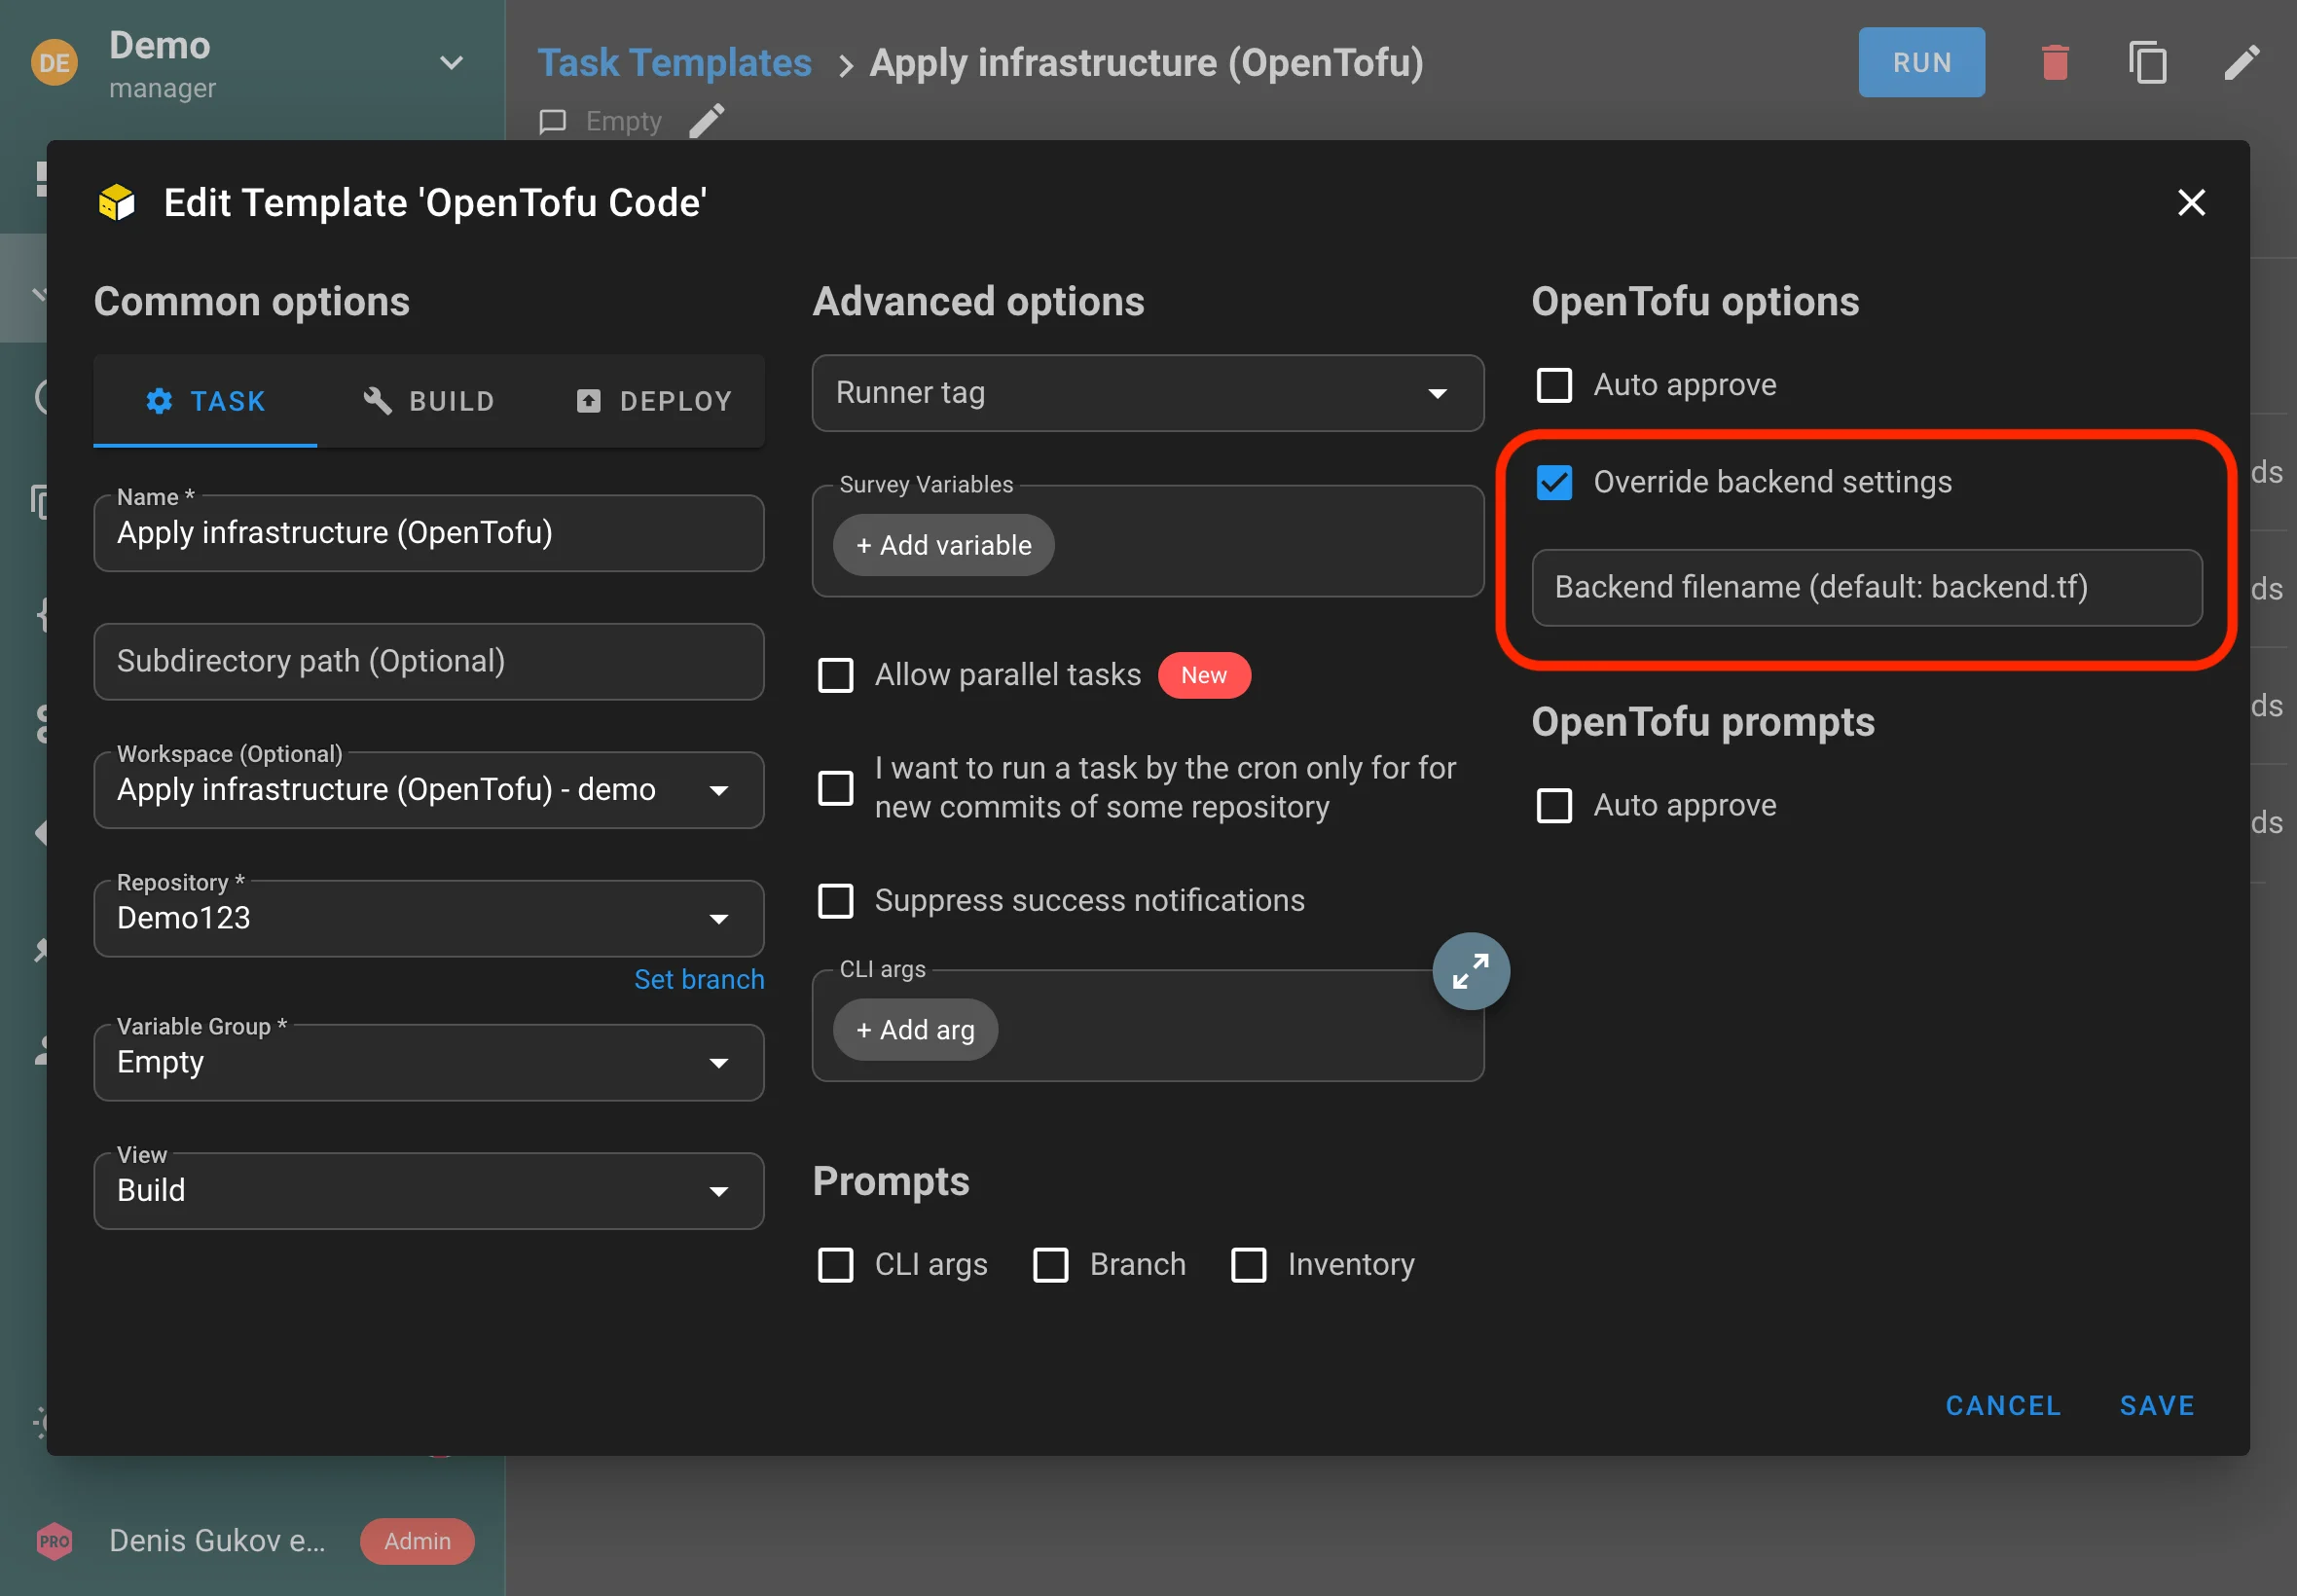
To use the built-in HTTP backend for storing the state of your Terraform tasks, you do not need to manually configure the backend in your Terraform code. Semaphore can automatically create the configuration file during execution. To enable this, simply check the Override backend settings option in your task template settings, as shown in the screenshot below.

Optionally, you can specify the name of the configuration file that will be dynamically created during execution. This is useful if your code already contains a backend configuration file and you need to override it dynamically to work with Semaphore's built-in backend.
Using the HTTP backend outside Semaphore
You can use the built-in HTTP backend not only when running tasks inside Semaphore, but also when executing Terraform code outside of Semaphore, such as from your local terminal.
To enable this, Semaphore allows you to create aliases (unique HTTP endpoint) for your state storage. These aliases make it easy to reference your state files from external environments.
To set this up, go to the Workspaces tab, select the desired workspace, and add an alias. You will also need to choose a key with a username and password, which will be used to authenticate access to the backend.
After this, you need to add the backend settings to your Terraform code:
terraform {
  backend "http" {
    address = "http://localhost:3000/api/terraform/***"
    username = "***"
    password = "***"
  }
}
Now Terraform will use Semaphore's built-in HTTP backend even when running from your terminal:
terraform apply